How to Use ESP32C6 As a Zigbee Coordinator
- 1.Key Takeaways
- 2.Can the ESP32-C6 Work as a Zigbee Coordinator?
- 3.What ESP32-C6 Board Should You Use?
- 4.What Do You Need Before Using ESP32-C6 for Zigbee?
- 5.How Do You Install ESP32-C6 Support in Arduino IDE?
- 6.How Does ESP32-C6 Zigbee Coordinator Firmware Work?
- 7.How Do You Flash ESP32-C6 Zigbee Coordinator Firmware?
- 8.How Do You Compile and Upload the Coordinator Firmware?
- 9.How Do You Pair a Zigbee Device With the ESP32-C6?
- 10.What Happens When a Zigbee Device Joins?
- 11.Joining Is Not the Same as Binding
- 12.How Do Zigbee Endpoints and Clusters Work?
- 13.How Do You Know Pairing Was Successful?
- 14.Can ESP32-C6 Control Commercial Zigbee Devices?
- 15.How Do You Add Multiple Devices to an ESP32-C6 Zigbee Network?
- 16.How Do Zigbee Routers Expand the ESP32-C6 Network?
- 17.How Should You Position an ESP32-C6 Coordinator?
- 18.How Do You Troubleshoot ESP32-C6 Zigbee Coordinator Problems?
- 19.Is an ESP32-C6 Better Than a Dedicated Zigbee Coordinator?
- 20.Zigbee Coordinators to Consider Instead of Building One
- 21.ESP32-C6 vs ZBDongle-P vs ZBDongle-E vs Network Coordinator
- 22.Is the ESP32-C6 Worth Using for Zigbee?
- 23.Final Thoughts
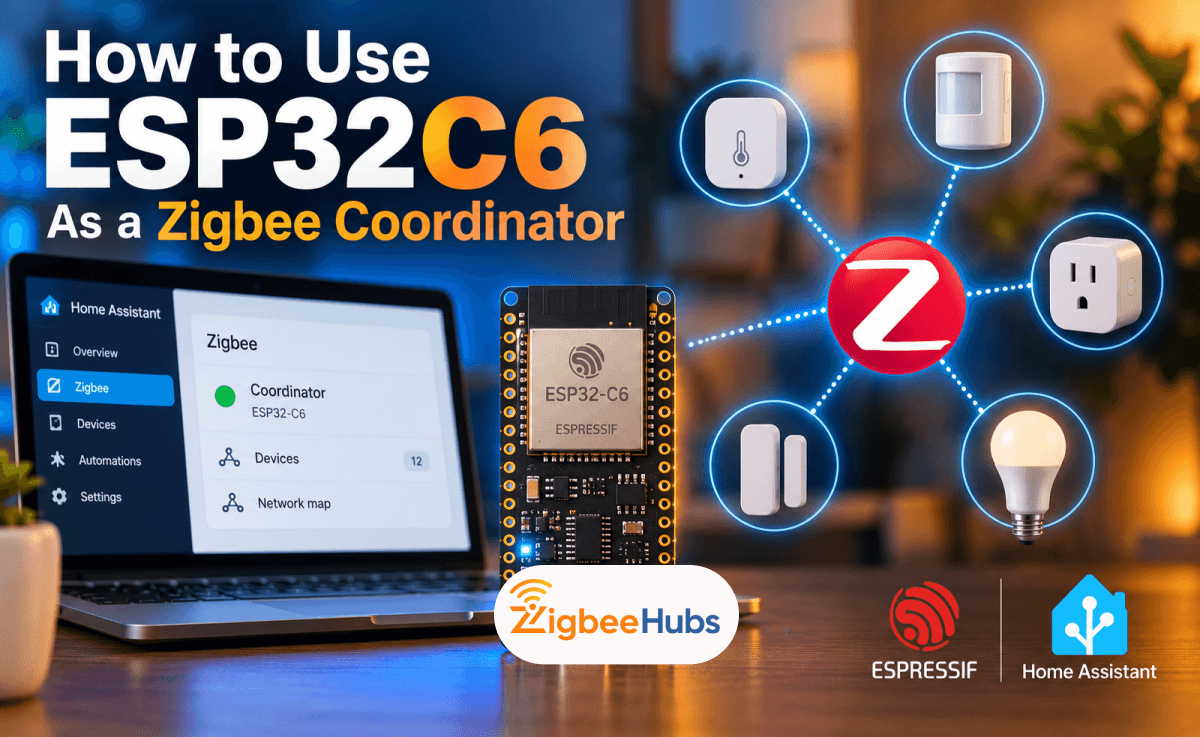
Yes, you can use the ESP32C6 as a Zigbee Coordinator. The ESP32-C6 includes an IEEE 802.15.4 radio and native Zigbee 3.0 support, so it can create and manage its own Zigbee network. With Espressif's Zigbee libraries, you can configure an ESP32-C6 development board as the coordinator, pair Zigbee devices, manage endpoints, and send Zigbee commands without a separate Zigbee radio.
Key Takeaways
- The ESP32-C6 natively supports Zigbee 3.0 and IEEE 802.15.4.
- It can operate as a Zigbee Coordinator, Router, or End Device.
- A coordinator creates the Zigbee network and allows other devices to join it.
- Arduino users need the official Espressif ESP32 board package with Zigbee support.
- Coordinator projects must use the Zigbee ZCZR mode and matching partition scheme.
- The ESP32-C6 is excellent for DIY coordinators, prototypes, custom gateways, and learning Zigbee development.
- A dedicated USB, Ethernet, or PoE Zigbee coordinator is usually easier for a permanent Home Assistant network.
Can the ESP32-C6 Work as a Zigbee Coordinator?
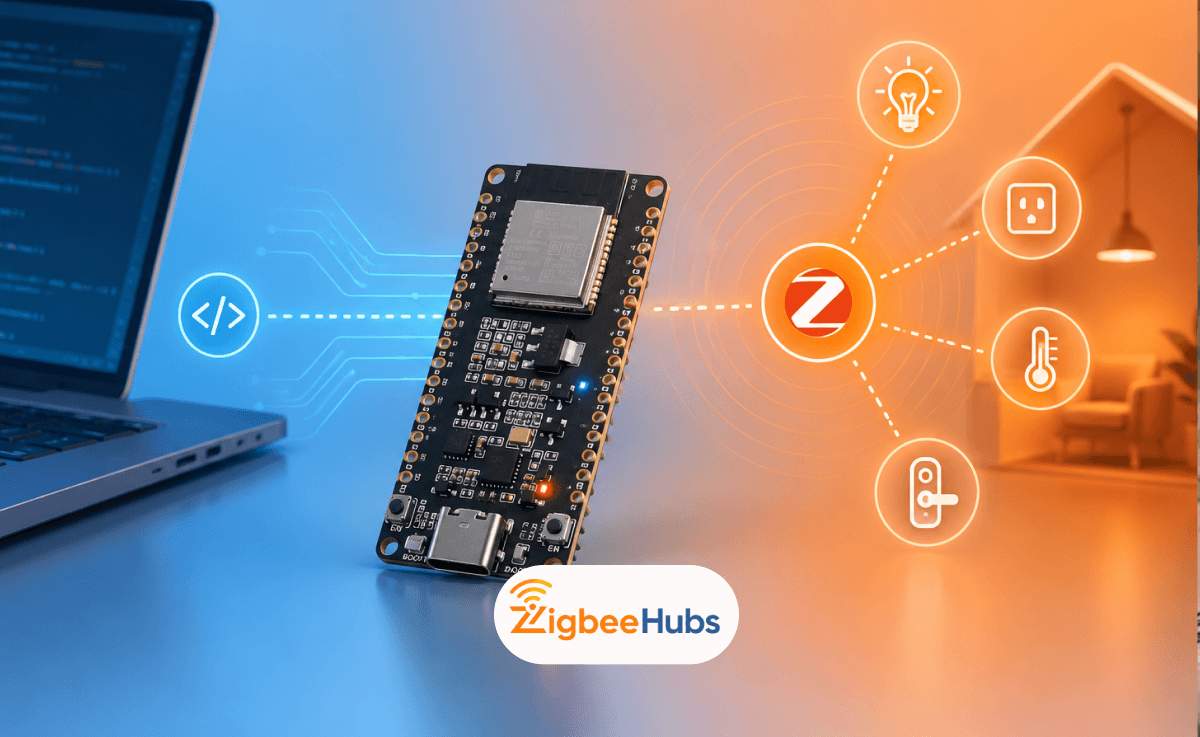
Yes. Unlike older ESP32 boards that only provide Wi-Fi and Bluetooth, the ESP32-C6 includes an IEEE 802.15.4 radio. This gives the chip the underlying wireless hardware required by Zigbee and Thread.
Espressif officially supports three Zigbee roles:
- Zigbee Coordinator: Creates and manages a Zigbee network.
- Zigbee Router: Joins an existing network and can route messages for other devices.
- Zigbee End Device: Joins a network but does not route traffic, making this role useful for sensors and other low-power devices.
For this guide, we are interested in the first role.
A Zigbee network normally has one coordinator. It forms the network, selects network parameters, handles device joining, and acts as the starting point for building the mesh.
The ESP32-C6 is particularly interesting because you can combine Zigbee with Wi-Fi, Bluetooth LE, GPIO controls, sensors, displays, and custom application logic on one inexpensive development platform.
That makes it much more than a basic USB radio.
You could, for example, create a custom gateway that receives information from Zigbee sensors and makes that information available over Wi-Fi.
ESP32-C6 vs Older ESP32 Boards
Do not assume every ESP32 can communicate with Zigbee directly.
Classic ESP32 boards and many ESP32-S variants do not contain an IEEE 802.15.4 radio. They therefore need an external Zigbee radio if you want native Zigbee communication.
The ESP32-C6 integrates:
- 2.4 GHz Wi-Fi 6
- Bluetooth Low Energy
- IEEE 802.15.4
- Zigbee 3.0
- Thread 1.3
The main processor is a 32-bit RISC-V CPU running at up to 160 MHz. The chip also includes 512 KB of high-performance SRAM and a 16 KB low-power SRAM block.
This combination makes the ESP 32 C6 particularly useful for multi-protocol IoT projects.
What ESP32-C6 Board Should You Use?
Several boards and modules use the ESP32-C6, so you are not limited to one development board.
Common options include:
- ESP32-C6 development boards
- Seeed Studio XIAO ESP32C6
- ESP32-C6-MINI-1 based boards
- ESP32-C6-WROOM-1 based boards
- ESP32-C6-WROOM-1U boards with external antennas
- ESP32-C6 DevKit boards
The basic Zigbee functionality comes from the ESP32-C6 itself rather than a particular development board.
For beginners, I recommend choosing a board with USB connectivity, clear pin labels, and good documentation. That makes flashing and troubleshooting much easier.
What Is the ESP32-C6-MINI-1?
The ESP32 C6 MINI 1 is a compact Espressif module built around the ESP32-C6 family.
It supports Wi-Fi 6, Bluetooth LE, Zigbee, and Thread. Depending on the exact module version, flash can be integrated into the package.
There are two important antenna versions:
- ESP32-C6-MINI-1: Integrated PCB antenna.
- ESP32-C6-MINI-1U: Connector for an external antenna.
The external antenna version can be useful when your coordinator will sit inside an enclosure or in a location where antenna placement matters.
What Is the ESP32-C6H4?
You may also encounter searches or product listings referring to ESP32 C6H4, ESP32-C6FH4, or similar chip variants.
These names describe particular ESP32-C6 configurations rather than an entirely different Zigbee platform. For example, Espressif lists ESP32-C6FH4 among the chips used in the ESP32-C6-MINI-1 family.
For a DIY Zigbee project, the more important questions are:
- Does the board use an ESP32-C6?
- How much flash does it provide?
- Does the board definition exist in your development environment?
- Does it expose the pins you need?
- Does it use an integrated or external antenna?
The Zigbee radio capability remains part of the ESP32-C6 platform.
What Do You Need Before Using ESP32-C6 for Zigbee?
You do not need much hardware to start experimenting.
Hardware
You will need:
- An ESP32-C6 development board
- USB data cable
- Computer running Arduino IDE
- One Zigbee device for testing
A second ESP32-C6 can also work as your test device. One board can operate as the coordinator while the other runs a Zigbee End Device example.
For real-world testing, I prefer adding at least one standard Zigbee 3.0 device as well. It helps determine whether your implementation works outside an all-Espressif test environment.
Software
For the Arduino approach used in this guide, install:
- Arduino IDE 2.x
- Official Espressif ESP32 board package
- ESP32 Zigbee libraries included with the supported Arduino-ESP32 environment
Espressif's Arduino Zigbee implementation sits on top of the ESP-ZIGBEE-SDK and provides higher-level classes for creating Zigbee devices.
The library includes functionality for:
- Network creation
- Network joining
- Commissioning
- Binding
- Groups
- Zigbee endpoints
- OTA updates
- Power management
- Coordinator, Router, and End Device roles
This saves you from implementing the Zigbee protocol from scratch.
How Do You Install ESP32-C6 Support in Arduino IDE?
The easiest way to program an ESP32-C6 coordinator is through the official Espressif Arduino core.
Step 1: Install Arduino IDE
Install a current Arduino IDE 2.x release.
Open Arduino IDE and go to:
File > Preferences
Locate Additional Boards Manager URLs.
Add Espressif's Arduino ESP32 package URL:
https://espressif.github.io/arduino-esp32/package_esp32_index.json
Click OK.
Next, open:
Tools > Board > Boards Manager
Search for:
esp32
Install esp32 by Espressif Systems.
For this project, use a current release that contains the ESP32 Zigbee libraries and ESP32-C6 support.
Step 2: Connect Your ESP32-C6
Connect the board to your computer with a USB data cable.
A common mistake is using a charging-only USB cable. The board may power on while never appearing as a serial device.
Open:
Tools > Port
Select the port belonging to your ESP32-C6.
Then select the correct board under:
Tools > Board > esp32
The exact board name depends on the hardware you purchased.
For example, a Seeed Studio XIAO ESP32C6 project should use its appropriate ESP32-C6 board definition rather than blindly selecting another C6 development board.
Step 3: Select Zigbee Coordinator Mode
This step is critical.
Go to the Arduino IDE Tools menu and locate Zigbee Mode.
Choose:
Zigbee ZCZR (coordinator/router)
ZCZR enables the configuration required for a Zigbee Coordinator or Zigbee Router.
If you accidentally configure the project as an End Device, coordinator firmware will not compile or operate correctly.
Espressif's examples include a compile-time check for this configuration. When the wrong mode is selected, you can encounter an error similar to:
Zigbee coordinator mode is not selected in Tools->Zigbee mode
If you see that error, check the Zigbee Mode setting before changing your code.
Step 4: Select the Correct Zigbee Partition Scheme
Next, open:
Tools > Partition Scheme
Select the Zigbee ZCZR partition appropriate for the flash capacity of your board.
Current Espressif documentation describes coordinator and router projects as using:
Zigbee ZCZR xMB with SPIFFS
where the flash size depends on your hardware.
This partition layout reserves the storage required by the Zigbee stack and application.
Do not simply copy a partition setting from a tutorial written for another ESP32-C6 board. An ESP32 C6 DevKitC 1 N8, for example, may have a different flash configuration from a smaller ESP32-C6 board.
Always match the partition configuration to the actual flash capacity of your board.
How Does ESP32-C6 Zigbee Coordinator Firmware Work?
Before flashing code, it helps to understand what the software actually needs to accomplish.
At a high level, coordinator firmware performs five jobs:
- Initializes the Zigbee stack.
- Registers one or more Zigbee endpoints.
- Starts the ESP32-C6 using the Coordinator role.
- Forms a Zigbee network.
- Allows compatible devices to join and communicate.
Espressif exposes the coordinator role through:
ZIGBEE_COORDINATOR
The Zigbee stack can then be started using the appropriate Zigbee.begin() configuration.
One important distinction is the endpoint class you choose.
Espressif currently provides both ZigbeeGateway and ZigbeeSwitch, along with endpoint classes for other device types.
They serve different purposes.
ZigbeeGateway
ZigbeeGateway represents a gateway endpoint. It is useful when you are building something designed to coordinate a Zigbee network and potentially bridge it to another network such as Wi-Fi or Ethernet.
ZigbeeSwitch
ZigbeeSwitch represents a Zigbee switch endpoint. It provides functionality for sending commands to devices such as Zigbee lights.
A ZigbeeSwitch can still run while the ESP32-C6 itself operates in the ZIGBEE_COORDINATOR role.
This distinction matters because older and newer examples online sometimes mix up a device's network role with its endpoint type.
Coordinator is a network role. Gateway or Switch describes what an endpoint does.
That is an important concept to understand before building more complex ESP32 C6 Zigbee projects.
How Do You Flash ESP32-C6 Zigbee Coordinator Firmware?
Once Arduino IDE is configured correctly, you can flash firmware that starts the ESP32-C6 in the Zigbee Coordinator role.
For a first project, a switch coordinator is useful because it demonstrates several important Zigbee concepts at once. The coordinator creates the network, allows another device to join, binds to a compatible light endpoint, and sends On/Off commands.
Example ESP32-C6 Zigbee Coordinator Code
The following example uses Espressif's Arduino Zigbee implementation and a ZigbeeSwitch endpoint.
#ifndef ZIGBEE_MODE_ZCZR
#error "Zigbee coordinator mode is not selected in Tools->Zigbee mode"
#endif

#include "ZigbeeCore.h"
#include "ep/ZigbeeSwitch.h"

#define SWITCH_ENDPOINT_NUMBER 5
#define GPIO_INPUT_IO_TOGGLE_SWITCH 9

ZigbeeSwitch zbSwitch = ZigbeeSwitch(SWITCH_ENDPOINT_NUMBER);

void setup() {
  Serial.begin(115200);

  // Identify the Zigbee endpoint
  zbSwitch.setManufacturerAndModel("Espressif", "ZigbeeSwitch");

  // Allow the switch to bind with multiple compatible devices
  zbSwitch.allowMultipleBinding(true);

  // Add the endpoint before starting Zigbee
  Zigbee.addEndpoint(&zbSwitch);

  // Open the network after reboot so devices can join
  Zigbee.setRebootOpenNetwork(180);

  // Configure the physical button
  pinMode(GPIO_INPUT_IO_TOGGLE_SWITCH, INPUT_PULLUP);

  // Start the ESP32-C6 as the Zigbee Coordinator
  if (!Zigbee.begin(ZIGBEE_COORDINATOR)) {
    Serial.println("Zigbee failed to start.");
    Serial.println("Rebooting...");
    ESP.restart();
  }

  Serial.println("Zigbee Coordinator started.");
  Serial.println("Waiting for a compatible Zigbee device...");
}

void loop() {
  static bool previousButtonState = HIGH;
  bool currentButtonState = digitalRead(GPIO_INPUT_IO_TOGGLE_SWITCH);

  // Toggle bound light when the button is pressed
  if (previousButtonState == HIGH && currentButtonState == LOW) {
    zbSwitch.lightToggle();
    Serial.println("Toggle command sent.");
    delay(250);
  }

  previousButtonState = currentButtonState;

  delay(10);
}
This is intentionally a simple starting point. A production coordinator normally needs additional logic for commissioning, device management, error handling, persistence, and whatever application or gateway interface you want to build.
What Does the Coordinator Code Do?
Several lines are especially important.
First:
ZigbeeSwitch zbSwitch = ZigbeeSwitch(SWITCH_ENDPOINT_NUMBER);
This creates a Zigbee switch endpoint.
The endpoint number identifies that logical Zigbee application endpoint. Remember that an endpoint is not the same thing as a physical GPIO pin.
Next:
Zigbee.addEndpoint(&zbSwitch);
This registers the endpoint with the Zigbee stack.
You should add your required endpoints before starting the Zigbee stack.
The following line controls commissioning after a reboot:
Zigbee.setRebootOpenNetwork(180);
In this example, the network can remain open for joining for 180 seconds after the coordinator starts.
Finally:
Zigbee.begin(ZIGBEE_COORDINATOR);
This is the critical part.
It starts the ESP32-C6 using the Coordinator network role rather than as a Router or End Device.
Pro Tip: Network Role and Endpoint Type Are Different
This causes a lot of confusion when people first experiment with ESP32-C6 Zigbee.
ZIGBEE_COORDINATOR describes the ESP32-C6's role in the Zigbee network.
ZigbeeSwitch, ZigbeeGateway, and other endpoint classes describe the application functionality exposed through Zigbee.
A board can therefore run as a Zigbee Coordinator while also exposing a switch endpoint.
Do not assume that using ZigbeeSwitch turns the ESP32-C6 into a Zigbee Router or End Device.
How Do You Compile and Upload the Coordinator Firmware?
Once your sketch is ready, check the Arduino settings one more time.
Confirm:
- Correct ESP32-C6 board selected
- Correct USB/COM port selected
- Zigbee Mode set to Zigbee ZCZR
- Correct ZCZR partition scheme selected
- USB data connection working
Then click Verify.
Arduino IDE will compile the sketch and the required Zigbee libraries.
If compilation completes successfully, click Upload.
Wait for the firmware to finish writing before disconnecting the ESP32-C6.
What If the ESP32-C6 Will Not Upload?
If the board powers on but Arduino cannot upload firmware, first check the USB cable.
A power-only cable is one of the easiest problems to overlook.
If the correct port still does not appear, manually enter the board's download or bootloader mode. The exact button sequence depends on your development board, so check its documentation before assuming every ESP32-C6 board uses the same physical controls.
For boards that expose BOOT and RESET/EN controls, entering download mode generally involves holding BOOT while resetting the chip.
Open the Serial Monitor
After flashing, open:
Tools > Serial Monitor
Set the baud rate to:
115200
Restart the board if necessary.
You should see your application's startup messages, such as:
Zigbee Coordinator started.
Waiting for a compatible Zigbee device...
Serial output becomes extremely useful once you start pairing devices.
I recommend keeping the Serial Monitor open during initial testing rather than flashing the board and immediately disconnecting it.
How Do You Pair a Zigbee Device With the ESP32-C6?
Once the coordinator creates its network, you need to allow another Zigbee device to join.
The basic process is:
- Start the ESP32-C6 coordinator.
- Open the Zigbee network for joining.
- Factory-reset the Zigbee device you want to pair.
- Put that device into pairing mode.
- Keep the device close to the coordinator during initial testing.
- Wait for it to join the network.
- Complete binding or application-specific configuration if required.
The exact pairing procedure on the end device varies by manufacturer.
For example, a Zigbee bulb may enter pairing mode after several power cycles, while a sensor may require holding its reset button.
Always check the manufacturer's reset instructions.
Why Should You Factory-Reset the Zigbee Device First?
A Zigbee device normally remembers the network it previously joined.
If your bulb, sensor, switch, or plug was connected to another Zigbee hub, simply putting your new coordinator nearby may not make it join.
Factory-resetting clears the old network information and lets the device search for a new Zigbee network.
This is one of the first things I check when a device refuses to pair.
What Happens When a Zigbee Device Joins?
A lot happens behind the scenes during what looks like a simple pairing process.
The coordinator first creates the Zigbee network and establishes its network parameters.
When joining is allowed, an eligible device can discover that network and request access.
After a successful join, the device becomes part of the coordinator's Personal Area Network, or PAN.
The network then identifies and communicates with the device using Zigbee addressing.
64-Bit IEEE Address
Each Zigbee device has a unique 64-bit IEEE address.
Think of this as the device's long-term hardware identity.
It remains useful for uniquely identifying a device even when other network information changes.
16-Bit Network Address
A joined Zigbee device can also receive a shorter 16-bit network address.
This short address is used for communication within the current Zigbee network and reduces the overhead required compared with repeatedly transmitting a full 64-bit address.
The short network address should not be treated as the device's permanent identity because it can change.
Joining Is Not the Same as Binding
This distinction is important.
Joining makes a device part of the Zigbee network.
Binding creates a relationship between compatible application endpoints or clusters so devices can communicate in a defined way.
A device can successfully join your network without automatically doing everything your application expects.
If the ESP32-C6 detects a device but your button cannot control it, investigate endpoints, clusters, and binding rather than immediately assuming pairing failed.
How Do Zigbee Endpoints and Clusters Work?
Understanding endpoints and clusters makes ESP32-C6 development much easier.
What Is a Zigbee Endpoint?
An endpoint represents a logical application inside a Zigbee device.
A single physical device can expose more than one endpoint.
For example, a multi-function device could contain separate logical functions for lighting, sensing, or other capabilities.
Endpoint numbers let Zigbee identify which application function a message targets.
In our example:
#define SWITCH_ENDPOINT_NUMBER 5
The switch application uses endpoint 5.
The number does not mean GPIO 5.
This is an easy mistake to make when you are accustomed to Arduino projects where numbers usually refer to physical pins.
What Is a Zigbee Cluster?
A cluster defines a standardized group of commands and attributes for a particular function.
For example, lighting devices can implement an On/Off cluster.
That cluster defines the language compatible devices use when exchanging On/Off information and commands.
Other Zigbee clusters can handle functions such as:
- Level control
- Color control
- Temperature measurement
- Relative humidity measurement
- Occupancy sensing
- Electrical measurements
- Groups
- Scenes
Clusters are a major reason devices from different manufacturers can communicate using the Zigbee standard.
Instead of inventing a completely different command structure for every light bulb, manufacturers can implement standardized Zigbee Cluster Library functionality.
How Do You Know Pairing Was Successful?
Do not judge successful pairing only by whether an LED stops blinking.
Use your coordinator's application logs and device information.
During development, the Serial Monitor should help you determine whether:
- The Zigbee stack started
- The network formed
- Joining is currently allowed
- A device attempted to join
- The device successfully joined
- Binding completed
- Commands are being sent
- Communication errors occurred
When working with more advanced coordinator firmware, you can also record information such as:
- IEEE address
- Network address
- Endpoint
- Manufacturer
- Model
- Device capabilities
This information becomes invaluable when you have several similar Zigbee devices on the same network.
Test the Device Immediately
Once a compatible device is joined and bound, test an actual command.
For the switch example, pressing the configured button should execute:
zbSwitch.lightToggle();
A compatible bound light should then change its On/Off state.
If the command works repeatedly, you have confirmed much more than basic pairing. You have verified that network formation, joining, endpoint communication, binding, and Zigbee command transmission are functioning.
Can ESP32-C6 Control Commercial Zigbee Devices?
Potentially, yes, but Zigbee 3.0 support does not guarantee that every commercial Zigbee device will work perfectly with your custom coordinator firmware.
This is an important limitation.
Commercial Zigbee products can use different device profiles, clusters, manufacturer-specific attributes, commissioning methods, and application behavior.
A basic On/Off light is much easier to support than a complex thermostat, smart lock, or manufacturer-specific multi-sensor.
For your first test, choose a relatively simple Zigbee 3.0 device.
Good development targets include:
- Smart bulbs
- Smart plugs
- Basic switches
- Contact sensors
- Temperature sensors
Once those work, you can start experimenting with more complex devices.
Pro Tip: Test More Than One Brand
When developing a custom coordinator, I would not declare the project finished after pairing another ESP32-C6.
Two boards using the same SDK can work perfectly while exposing interoperability problems only when you introduce third-party hardware.
Try devices from at least two manufacturers if interoperability is important to your project.
That gives you a much better idea of how your coordinator behaves in a real Zigbee environment.
How Do You Add Multiple Devices to an ESP32-C6 Zigbee Network?
A coordinator is not limited to one device.
Once the network exists, additional Zigbee devices can join while commissioning is open.
The process is generally:
Do not leave a production Zigbee network permanently open unless your application has a specific reason to do so.
Keeping joining controlled reduces the chance of unintended devices being admitted to your network.
How Do Zigbee Routers Expand the ESP32-C6 Network?
One of Zigbee's biggest advantages is its mesh network architecture.
The coordinator starts the network, but it does not need to communicate directly with every device.
Zigbee Routers can relay traffic between devices.
Mains-powered products often operate as routers. Depending on the product, these may include:
- Smart plugs
- In-wall switches
- Smart bulbs
- Dedicated Zigbee repeaters
Battery-powered sensors usually operate as End Devices rather than Routers because continuously participating in routing would consume too much power.
As you add strategically placed routers, devices farther from the ESP32-C6 can potentially communicate through intermediate nodes.
This is why a well-designed Zigbee mesh can cover a much larger home than the coordinator's direct radio range alone.
Coordinator vs Router vs End Device
| Zigbee Role | Creates Network | Routes Traffic | Typical Use |
|---|---|---|---|
| Coordinator | Yes | Yes | Main Zigbee controller |
| Router | No | Yes | Smart plugs, repeaters, powered devices |
| End Device | No | No | Battery sensors, buttons, contact sensors |
There is normally one Coordinator per Zigbee network, while the network can contain multiple Routers and End Devices.
How Should You Position an ESP32-C6 Coordinator?
Firmware is only half of a reliable Zigbee network.
Radio placement matters.
Zigbee and 2.4 GHz Wi-Fi operate in the same general frequency range, so poor placement can contribute to interference and weak communication.
Avoid placing your coordinator:
- Directly beside a Wi-Fi router
- Inside a metal enclosure
- Behind large metal objects
- Beside other high-power 2.4 GHz transmitters
- In a crowded equipment cabinet when better placement is possible
For a permanent installation, I prefer placing the coordinator in an open, central position and then building the mesh outward with reliable mains-powered Zigbee Routers.
If you use a USB-connected coordinator, a USB extension cable can also help move the radio away from a noisy computer or server.
What About an External Antenna?
Some ESP32-C6 modules and development boards provide external antenna options.
An external antenna can help when:
- The board sits inside an enclosure
- You need more flexible antenna placement
- The coordinator is installed inside an equipment cabinet
- The onboard antenna's orientation is poor for your installation
However, a bigger antenna does not automatically fix a poorly designed Zigbee mesh.
Your end devices still need reliable return paths.
For a large home, adding properly positioned Zigbee Routers is often more important than trying to solve every range problem at the coordinator.
How Do You Troubleshoot ESP32-C6 Zigbee Coordinator Problems?
Most ESP32-C6 Zigbee problems come from one of four areas: Arduino configuration, flashing, network commissioning, or device compatibility.
Before rewriting your firmware, check the simple things first. In our experience, an incorrect Zigbee mode or a device that has not been factory-reset can look like a much more complicated software problem.
ESP32-C6 Is Not Detected by Arduino IDE
If Arduino IDE cannot detect your board, start with the USB connection.
Check that:
- You are using a USB data cable, not a charging-only cable.
- The correct board is selected.
- The correct serial port is selected.
- The board receives power.
- Another application is not holding the serial port open.
If the board still cannot be flashed, use its bootloader or download mode.
The exact process varies between development boards. Boards with BOOT and RESET/EN controls generally allow you to force the ESP32-C6 into download mode using those buttons.
Check your board manufacturer's instructions before following a button sequence intended for another ESP32-C6 board.
Zigbee Coordinator Mode Compilation Error
A common error is:
Zigbee coordinator mode is not selected in Tools->Zigbee mode
This normally means the sketch expects a Coordinator/Router build, but Arduino IDE is configured for another Zigbee mode.
Go to:
Tools > Zigbee Mode
Select:
Zigbee ZCZR
Then verify your partition scheme.
The coordinator/router Zigbee stack needs a compatible ZCZR partition configuration.
Compile the sketch again before changing any code.
ESP32-C6 Starts but Devices Will Not Pair
First, make sure the Zigbee network is actually open for joining.
Our example uses:
Zigbee.setRebootOpenNetwork(180);
That creates a limited commissioning window after the coordinator restarts.
If you wait too long before putting the end device into pairing mode, it may never join.
Try this sequence:
- Factory-reset the Zigbee device.
- Restart the ESP32-C6 coordinator.
- Immediately put the Zigbee device into pairing mode.
- Keep the device close to the coordinator.
- Watch the Serial Monitor for activity.
Do not repeatedly press pairing buttons without first confirming the device has actually left its previous Zigbee network.
A Device Joins but Does Not Respond
Joining does not automatically guarantee application compatibility.
If your coordinator recognizes a device but cannot control it, check:
- Device endpoints
- Input and output clusters
- Binding
- Supported commands
- Attribute reporting
- Manufacturer-specific functionality
For example, a generic On/Off implementation should not be expected to expose every feature of a complex Zigbee thermostat or smart lock.
This is where custom coordinator development becomes more involved than simply connecting a commercial coordinator to established software such as ZHA or Zigbee2MQTT.
Zigbee Range Is Poor
Do not immediately assume the ESP32-C6 needs a larger antenna.
First check placement.
Move the coordinator away from:
- Wi-Fi routers
- Metal cabinets
- USB 3.0 equipment
- Mini PCs and other dense electronics
- Large metal surfaces
Then add reliable mains-powered Zigbee Routers to strengthen the mesh.
Pro Tip: Test your coordinator in an open location before installing it permanently. If range becomes poor only after moving it into a cabinet, you have probably found an RF placement problem rather than a firmware problem.
Should You Factory-Reset the Coordinator?
A reset can be useful when you intentionally want to create a completely new Zigbee network or clear stored network information.
However, do not make factory resetting your first troubleshooting step.
Resetting a coordinator can remove network information and may force previously joined devices to be paired again.
For an established smart home, treat coordinator network data as important configuration rather than disposable test data.
Is an ESP32-C6 Better Than a Dedicated Zigbee Coordinator?
It depends on what you are building.
The ESP32C6 is an excellent choice when your goal is learning, prototyping, embedded development, or creating a highly customized Zigbee application.
A dedicated coordinator is usually better when your goal is simply to run a dependable Zigbee network in Home Assistant.
| Feature | ESP32-C6 DIY Coordinator | Dedicated Coordinator |
|---|---|---|
| Initial setup | Manual | Usually easier |
| Coding required | Yes for custom projects | Usually no |
| Customization | Excellent | Limited by firmware |
| GPIO integration | Excellent | Usually limited |
| Zigbee learning | Excellent | Moderate |
| Home Assistant setup | More advanced | Usually straightforward |
| Troubleshooting | Developer-focused | Better documented |
| Best use | Development and custom projects | Everyday smart homes |
Neither approach is universally better.
They solve different problems.
Choose an ESP32-C6 Coordinator If:
- You want to learn how Zigbee works.
- You are developing an IoT product.
- You need custom GPIO behavior.
- You want to build a custom Zigbee-to-Wi-Fi gateway.
- You need control over the firmware.
- You enjoy embedded development.
- You are experimenting with Zigbee endpoints and clusters.
The ESP32-C6 is especially compelling for developers because Wi-Fi, Bluetooth LE, and IEEE 802.15.4 are available on the same platform.
Choose a Dedicated Zigbee Coordinator If:
- You primarily want Zigbee in Home Assistant.
- You want an established Zigbee2MQTT or ZHA setup.
- You do not want to maintain custom firmware.
- You have dozens of smart home devices.
- Long-term reliability matters more than experimentation.
- You want easier community troubleshooting.
A dedicated coordinator can save considerable time if your actual goal is home automation rather than firmware development.
Zigbee Coordinators to Consider Instead of Building One
If you would rather use a ready-made coordinator, ZigbeeHubs carries dedicated hardware designed for this purpose.
These devices make more sense for users who want to build a Home Assistant Zigbee network without developing their own coordinator firmware.
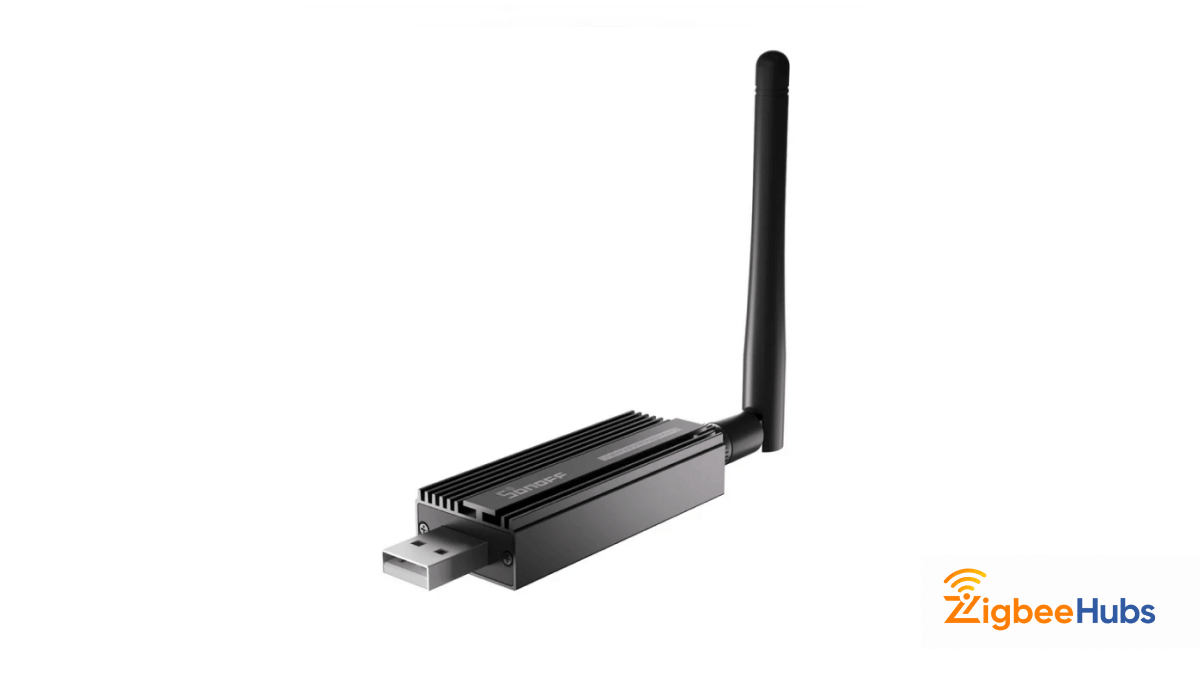
SONOFF Zigbee 3.0 USB Dongle Plus ZBDongle-P
The SONOFF Zigbee 3.0 USB Dongle Plus ZBDongle-P is a USB coordinator based on the Texas Instruments CC2652P platform. It is a strong choice for Home Assistant users who want a widely supported coordinator without building one from scratch.
Key Features
- Texas Instruments CC2652P platform
- Zigbee 3.0 support
- External antenna
- Up to +20 dBm output power
- Aluminum enclosure
- USB connectivity
- ZHA support
- Zigbee2MQTT support
- Designed for use as a Zigbee coordinator
Pros
- Strong community support
- Works with popular Home Assistant Zigbee platforms
- External antenna
- Metal enclosure
- No custom ESP32 firmware development required
- Good option for a permanent smart home installation
Cons
- Requires a USB connection to the host
- Coordinator placement depends partly on the host's location
- A USB extension cable may be useful for better RF placement
Best for: Home Assistant users who want a proven USB coordinator rather than a DIY development project.
SONOFF Zigbee 3.0 USB Dongle ZBDongle-E
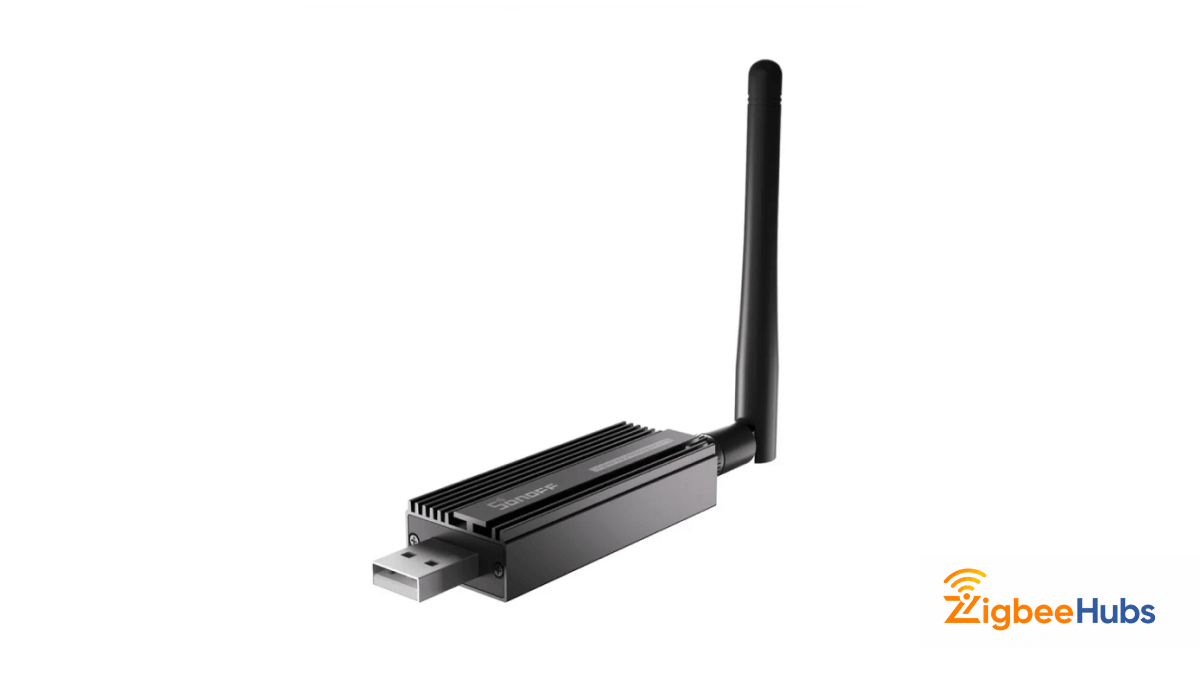
The SONOFF ZBDongle-E is another dedicated USB coordinator option. Instead of the Texas Instruments platform used by the ZBDongle-P, the ZBDongle-E is built around a Silicon Labs EFR32MG21 wireless SoC.
This makes it an alternative for users who prefer the Silicon Labs ecosystem while still wanting a compact USB coordinator.
Key Features
- Silicon Labs EFR32MG21 platform
- Zigbee 3.0 support
- USB connectivity
- External antenna
- Designed for smart home coordinator applications
- Compatible with popular open-source Zigbee ecosystems when supported by the selected software and firmware
Pros
- Compact coordinator solution
- Modern Silicon Labs radio platform
- External antenna
- No custom coordinator hardware required
- Suitable for Home Assistant installations
Cons
- Software and firmware support should be checked for your chosen Zigbee platform
- Requires a USB host
- USB placement can be less flexible than Ethernet or PoE coordinators
Best for: Users looking for a Silicon Labs-based USB Zigbee coordinator.
SMLIGHT SLZB-06 Series
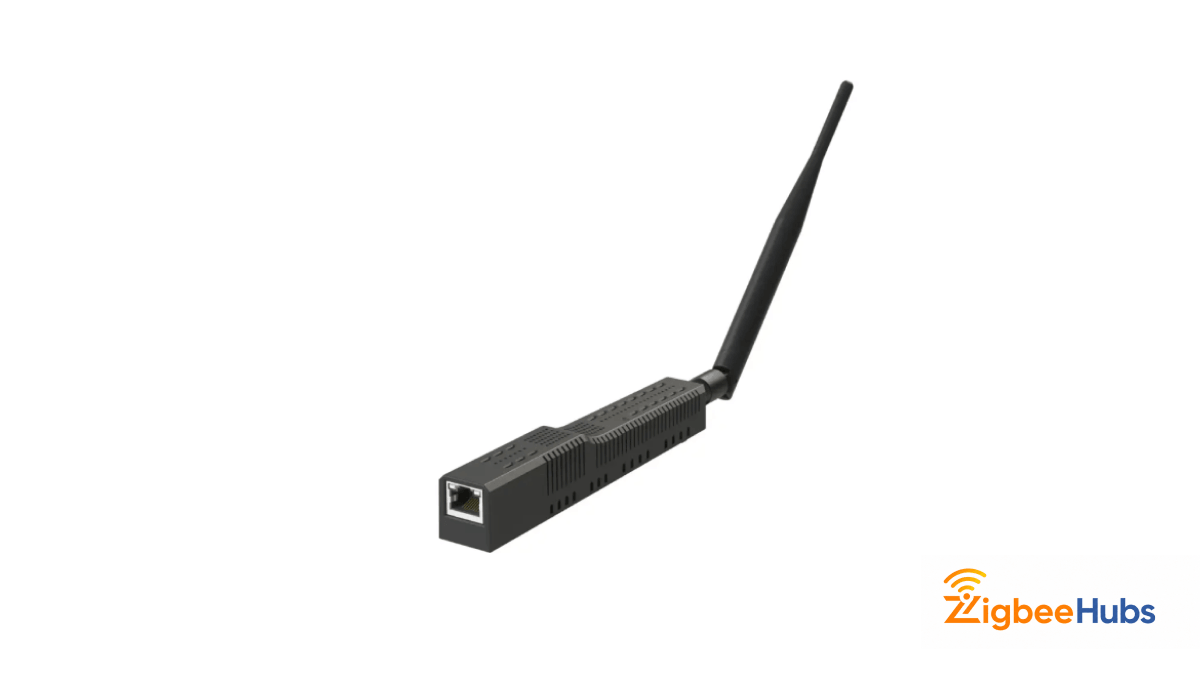
The SMLIGHT SLZB-06 series takes a different approach. Instead of forcing the coordinator to sit directly beside your Home Assistant server, network-connected models can place the Zigbee radio in a more suitable location and communicate over Ethernet.
That can be extremely useful when your server sits in a rack, cabinet, basement, or another poor location for a 2.4 GHz radio.
Key Features
- Network-connected Zigbee coordinator design
- Ethernet connectivity
- PoE capability on supported models
- Web-based management features
- External antenna
- Designed for Home Assistant and similar smart home deployments
- Coordinator can be positioned separately from the main server
Pros
- Much more flexible coordinator placement
- Ethernet provides a stable wired connection
- PoE can carry power and data over one cable
- Useful when the Home Assistant server is hidden in a cabinet
- External antenna
- Well suited to permanent installations
Cons
- Costs more than basic DIY ESP32-C6 boards
- Initial network configuration is more involved than plugging in a basic USB dongle
- Features vary between SLZB-06 models, so choose the exact variant carefully
Best for: Larger or more permanent smart homes where coordinator placement and Ethernet connectivity are important.
ESP32-C6 vs ZBDongle-P vs ZBDongle-E vs Network Coordinator
Here is the simplest way to decide:
| Coordinator | Best For | Connection | Main Advantage |
|---|---|---|---|
| ESP32-C6 | Developers and DIY projects | Depends on project | Maximum customization |
| SONOFF ZBDongle-P | Home Assistant users | USB | Mature CC2652P ecosystem |
| SONOFF ZBDongle-E | Silicon Labs users | USB | EFR32MG21 platform |
| SMLIGHT SLZB-06 Series | Permanent installations | Ethernet/PoE on supported models | Flexible placement |
If I were learning Zigbee development, I would choose the ESP32-C6.
If I were building a normal Home Assistant network and did not need custom firmware, I would choose a dedicated coordinator instead.
The distinction is important because the cheapest hardware is not always the solution that costs the least amount of time.
Is the ESP32-C6 Worth Using for Zigbee?
Yes. The ESP32-C6 is one of the most interesting ESP32 platforms for Zigbee development because IEEE 802.15.4 support is built directly into the chip.
You can use the same platform to experiment with Zigbee, Thread, Wi-Fi, Bluetooth LE, sensors, physical controls, and custom gateway applications.
That flexibility makes it especially valuable for:
- IoT developers
- Embedded developers
- Smart home enthusiasts
- Students learning Zigbee
- Custom gateway projects
- Prototype smart home products
However, I would separate development use from production smart home use.
If you enjoy writing firmware and want to understand what happens below the Home Assistant interface, building an ESP32 C6 Zigbee coordinator is an excellent project.
If you simply want 50 Zigbee devices to work reliably in your home, a dedicated coordinator running with a mature platform such as ZHA or Zigbee2MQTT is usually the more practical route.
Final Thoughts
Using the ESP32C6 as a Zigbee Coordinator gives you far more control than simply plugging in a commercial Zigbee dongle. You can create the network, define endpoints, work directly with clusters, experiment with binding, and combine Zigbee with the ESP32-C6's other wireless and GPIO capabilities.
The right coordinator therefore depends on the goal: use ESP32-C6 when you want to build and customize the Zigbee system; use dedicated coordinator hardware when you mainly want to use the Zigbee system.
Looking for a Compatible Zigbee Hub?
Explore our tested selection of Zigbee 3.0 gateways, Home Assistant coordinators, and smart controllers.
Have Questions or Need Setup Help?
Join the discussion on Smarthome Forum! Ask questions, share your home automation setup, or get expert troubleshooting advice from the community.